icon_Logo

(863) 662 9988


How Big of a Pergola do I Need?


Only you can answer that question, and it will depend largely on the layout of your property. But we can share with you some basics about how pricing works in the shade structure industry, which will help you weigh your options.


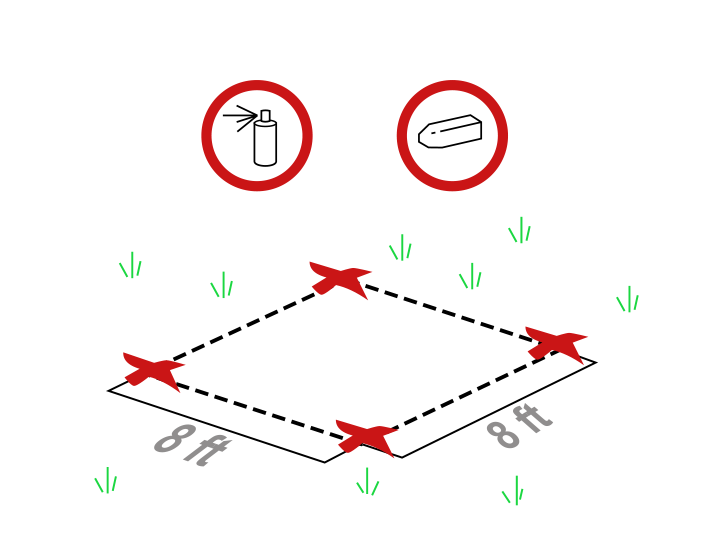
Price per square foot decreases as square footage increases. For example, the smallest kits, those that give you 64 sq. ft. of space (8 x 8=64), are priced the highest on a square foot basis. From there, prices per square foot drop sharply as you go up to about 120 sq. ft. After that, the price per square foot continues to drop, but at a slower rate. All of this is due to the ratio of wood/area (or vinyl/area, etc.), and to semi-variable costs of shipping and production.


If you buy a small model (8x8 size or a 10x8 size) you will be paying the highest price per square foot. Prices for small models run 30% to 50% higher than large models on a per square foot basis. If you buy a model that is a bit larger, say an 11x11 or a 12x10, you will be paying more than an 8x8, but you will get more for your money on a per square foot basis. The advantages of a larger structure are that you can entertain more guests under it, and you can fit more under it, such as an outdoor kitchen, a fire pit, a hanging swing, furniture, etc.


Consider this: A 12x10 gives you almost 100% more room as an 8x8, but it only costs 25% more on average. That’s a 4:1 ratio to your advantage.


If you live in a northern region that has a milder summer, there is less of a need for a huge design in your backyard. The further south you get, the more frequently you will want the benefits of shade. On the other hand, we have sold designs to customers in rainy regions who put their covered roof models to good use.


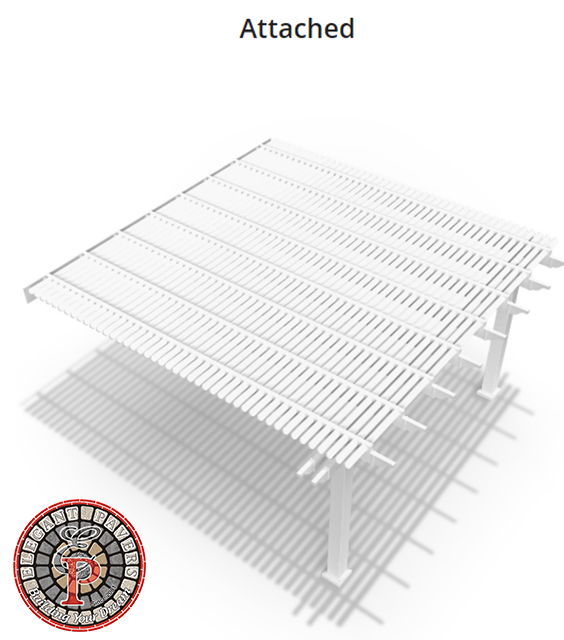
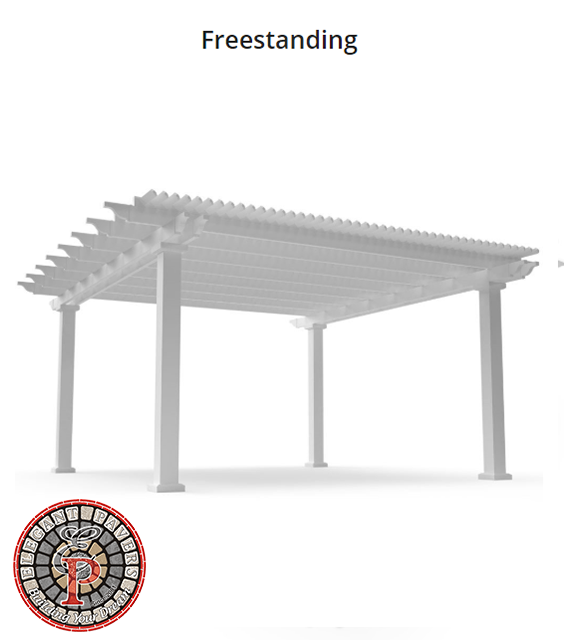
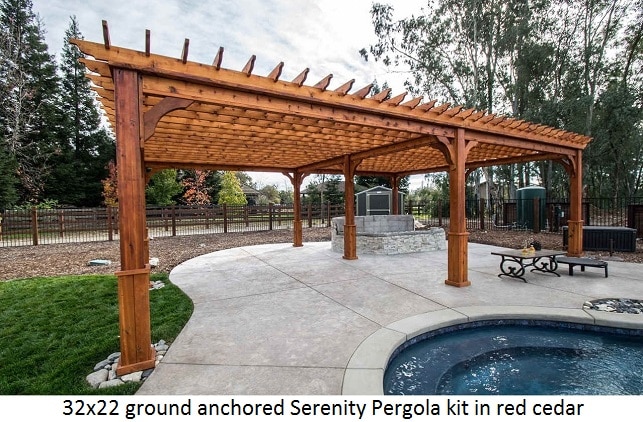
Attached (wall anchored) vs. free standing (ground anchored)


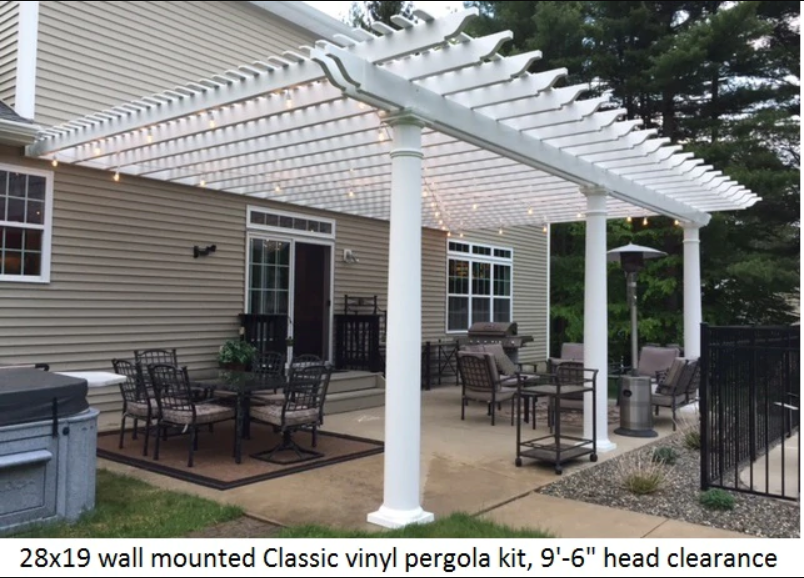
In the pergola industry, "attached" means wall mounted, while "free standing" means anchored to the ground. A pergola attached to the house is generally less expensive than a free standing design because an attached model only has two support columns instead of four. Fewer columns and lower shipping costs leads to a lower priced product for you. Sometimes you will see these models advertised as a "two post pergola" or a "wall mounted pergola".


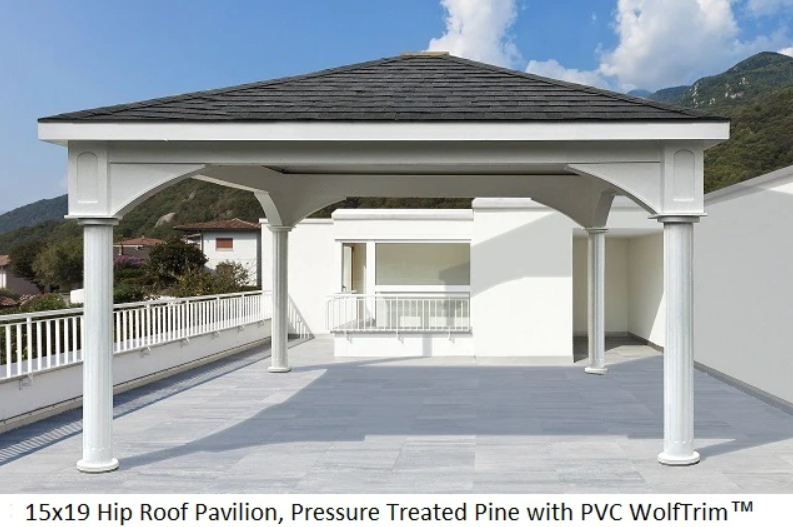
To roof or not to roof?


A pergola with a roof is called a pavilion. These are more expensive because of the extra material and craftsmanship required to create the roof. Roofs are heavy, and therefore cost a lot to ship. But a design with a roof arguably has more utility because it offers more shade from the sun and shelter from rain.

Covered pergola kits may simply have a look that appeals to you. They have a more solid look, and some say a more inviting look, almost begging visitors to relax under their shelter and stability.


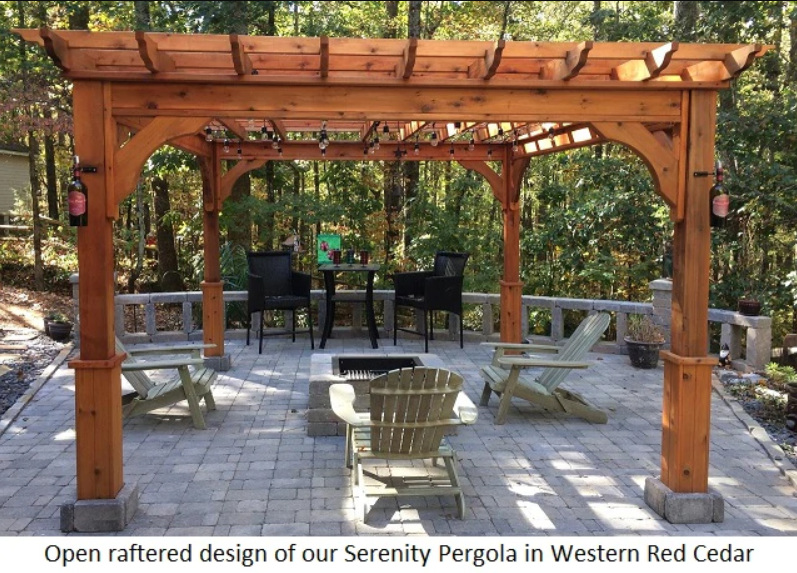
Retractable Shade Pergola Kits


If you don't want to jump across the roof, but still want the shadow option, then a good compromise is a "retractable roof pergola." These models have a canopy that adapts exactly to its exterior structure. The canopy can be moved from side to side, depending on whether you want to bask in the sun or cover yourself (and the dining room table!) From a sudden rain in the middle of the afternoon.

You will see these models sometimes advertised as a "retractable pergola" or "retractable shade pergola". They are all the same concept. Our most popular model to fit a retractable canopy is our Serenity model in Western Red Cedar. It comes in more than 256 sizes, including 14x14, 14x16 and even 20x20. In fact, we do it in any size! We customize the size for you up to the inch at no additional cost. Just call us and we will create your drawings for you to review and have us edit.
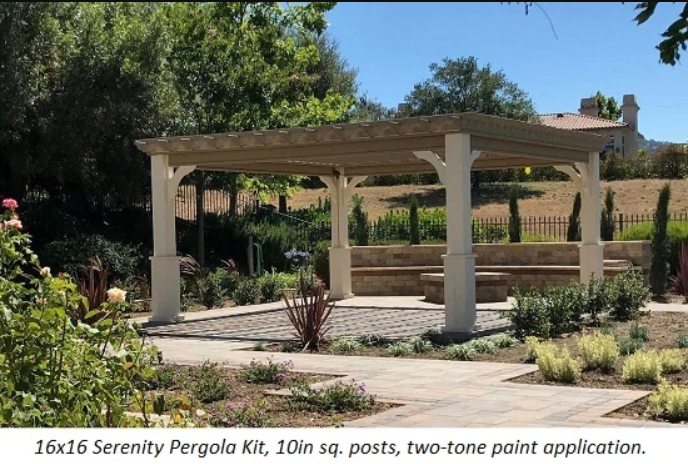
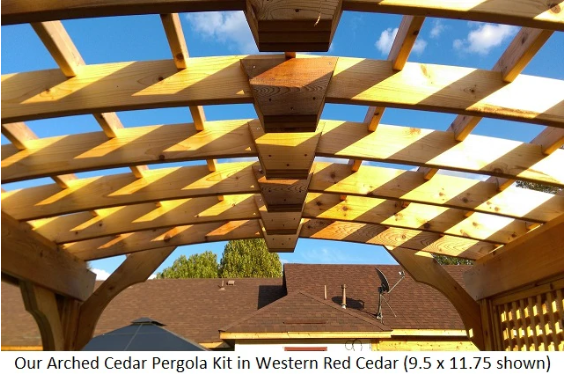

The Arched Premium


Arched pergolas are beautiful, but they are a bit more expensive than other types. If you want to save some money, you may want to consider a different style. On a per square foot basis, arched models can cost 20-40% more than other styles. For example, for a size of 16x16, the arched design can cost you about $ 1,600 more. Sometimes you will see them advertised as "curved pergolas."


What is The Best Material?


Advantages and Disadvantages of Cedar


I would venture to say that there are more cedar pergola kits sold each year than any other type. Cedar is the most common wood used for all types of backyard structures, including gazebos, pergolas, sheds, decorative bridges, furniture, etc.


In North America, there are several species of cedar. But we use Western Red Cedar for our structures. Western Red Cedar grows in the Pacific Northwest. It looks better than other cedars, and is the most durable and decay resistant of all cedar species. It is also abundantly available in North America, so therefore is much less expensive than California Redwood. Like California Redwood, Western Red Cedar will turn gray over time unless treated with sealant every few years. Cedar's durability and decay resistance is excellent, and among North American wood species is a close second to California Redwood.


Other Woods

Pressure treated pine: if you want to paint the structure of your backyard, we recommend that you consider pressure treated pine. It is the least expensive of the three forests we have discussed so far. It is not as attractive as California Redwood or Western Red Cedar, but if you plan to paint it, the paint hides this weakness. Paint requires maintenance over the years. Consider painting yours white for a wedding or catering environment. Or paint it gray or light blue for a nautical or coastal landscape. Or paint it brown or black if your property is covered with trees.


Advantages and Disadvantages of Composite Fiberglass Kits


Fiberglass pergola kits (also known as "compounds") look completely different. Don't you want a rustic or rustic structure in your backyard? Would you rather have a modern and contemporary centerpiece? Then consider a fiberglass model. Our structural fiberglass is lighter than wood, but pound per pound stronger than steel.

The fiberglass compound does not oxidize, rot, deform, bend or suffer insect attacks. And if you want a waterproof pergola, but don't feel comfortable with vinyl, the fiberglass compound is the way to go. Another great advantage of fiberglass is that it comes in any color you can imagine. We will paint your fiberglass pergola in any color you want for only $ 249.

The only disadvantage of fiberglass in relation to wood and vinyl is that it is more expensive. All our wood and fiberglass models can be customized according to your size preferences.


Vinyl or Plastic


Vinyl has come a long way since the 1980's. It used to be that the biggest advantage of vinyl, also known as plastic, is that it was the least expensive of all the different materials. Vinyl used to have a shorter useful life than wood or fiberglass composite. It used to crack and warp over time. And it usually came in only one color, white.

But times have changed. So much so that today many believe vinyl is the preferred material for outdoor backyard structures. Today, vinyl comes with sun-protective additives that extend its useful life. Vinyl fence and outdoor structure makers provide multi year warranties on their products, some as long as 25 years. Vinyl is maintenance free, but it more costly than wood. It cannot be painted, although PVC trimboard can be be (our patio covers and pavilions feature Wolf Trim ™ brand high density PVC trimboard).


Should You Buy a DIY Pergola Kit, or Buy a Custom Pergola?


All our pergola kits, whether labeled "DIY" or "custom", are DIY kits. There is no difference in the difficulty of assembly between the two. Second, there is no price difference between the two (on a per square foot basis). The only exceptions to these rules are if the custom pergola has a strange shape, such as a trapeze or a rhombus. In these cases there is a price premium, and assembly can be moderately more difficult.

Many people don't know this, and unfortunately they settle for a standard size kit size that doesn't quite fit their landscape perfectly. Often these drawings are sufficient to obtain permit approval from your local permitting authority. If they require an engineer's stamp, we can provide that also for a fee.

Step 1. Choose Modern or Traditional


Step 2. Your Desired Space


Step 3. Your Desired Shade


Step 4. Your Beam Caps


Step 5. Your Desired Shade


How to Build a Pergola

A pergola is an open outdoor structure that is made up of wooden posts and has a trussed roof. To build a pergola you'll need to prepare and measure a space in your yard before laying down the foundation posts. Once a strong foundation is in place, you'll finish the project by constructing the roof. With the right materials and forethought, you can build a sturdy pergola that can add some style to your yard's decor and can create a shaded area where you can relax and socialize.


Part 1

Preparing and Measuring Your Space

Research zoning laws in your area. States and towns have zoning laws that restrict certain kinds of construction. Call your local building commission or zoning department to make sure that you can build a pergola on your property.

Part 2

Contact local utility companies before you dig holese

If you’re building your pergola in your yard, you’ll have to dig deep holes which can damage pipes or power lines under the ground. Look at your utility bills to find the phone numbers for your utility companies. Call them and ask about any pipes or lines that may be running underground.

Part 3

Measure and mark an 8 by 8 feet (2.4 m × 2.4 m) square in your yard

Mark each corner of the square with spray paint. This will be the length and width of your pergola. Measure and mark a different sized square if you want a larger or smaller pergola. This is an average size for a pergola.

If you measure a space that's larger or smaller than 8 by 8 feet (2.4 m × 2.4 m), you'll have to adjust the size of your wooden posts accordingly.

If you are installing the pergola on a patio, use chalk instead of spray paint to mark your measurements.


Part 4

Dig a hole in each corner of your measured space

Each hole should be 28–48 inches (71–122 cm)-deep. These holes will hold your posts in place and ensure that your pergola stays together. Make each corner hole 8 by 8 inches (20 cm × 20 cm) so that they are large enough to fit your pergola’s posts.

If you are placing your pergola over a patio, you have to screw metal post anchors into the patio instead of digging holes.


Part 5

Pack the bottom of the hole with 4 inches (10 cm) of gravel

Pouring gravel on the bottom of the hole will give your posts something to rest on. If you don’t do this, they will sink into the dirt. You should now have a total of four holes packed with gravel.

Part 6

Measure the depth of each hole and remove or add gravel to level them

Use a tape measure to measure the walls of each hole. If they aren’t the same size, remove or add gravel so that all the holes have a uniform depth. If you don’t do this, your pergola will be lopsided.

Part 7

Place a post into the first hole

You’ll want to use posts that are at least 8 by 8 inches (20 cm × 20 cm) thick and 10 feet (3.0 m) long. Work on each post one at a time until it's secured to the ground. Put one end of the post into a hole and make sure that it rests flat on the gravel. Hold the post in place as you move onto the next steps.

Part 8

Make sure that the post is level

Hold a level vertically against the post. The bubble in your level should line up in the middle of the level indicator. If your post is on an angle, readjust it.

Hold the level against the post as you adjust it so that you know when the post is level.

Part 9

Nail smaller boards to your post to brace it

Have a friend hold the posts in place while you nail 1 by 4 feet (0.30 m × 1.22 m) planks of wood on a 30-degree angle to each side of the post. Angle the brace boards so that one end of the brace is wedged against the ground and the other end is pushed up against your post. Then, drive a nail through the brace and into the post to hold it in place. Place the other posts into the holes and brace them all.

You can use scrap wood or purchase additional planks for the braces.

You can stop holding the posts in place once you brace them.

Part 10

Level and brace the rest of your posts

Repeat the steps on the next three posts. Once you're done, each foundation post should stand vertically and form the foundation for your pergola.

Part 11

Mix a bag of concrete with water

Purchase an 80 pounds (36 kg) bag of concrete and pour the dry concrete dust into a wheelbarrow. Read the instructions on the packaging so you know how much water you’ll need to add to the powder. Slowly pour the water into the concrete dust and mix it together with a shovel. This will create concrete that you can use to close up the holes for your posts.

Part 12

Pour concrete into each post hole

Continue to pour concrete into the hole until it's 3–6 inches (7.6–15.2 cm) from the top of the hole. Make sure that the concrete doesn't overflow or it will look messy.

Part 13

Stir the concrete in the hole to aerate it

Use a stick to mix the concrete while it's still wet. This will remove air bubbles.

Part 14

Let the concrete dry for 24 hours

After 24 hours have passed, the concrete should be solid enough to hold the foundation posts of your pergola in place.

Part 15

Detach the braces from the posts

Remove the nails from the braces on your posts. They should now stand vertically and be firmly implanted in the ground.

Part 16

Mark 2 feet (0.61 m) from the top on both sides of each post

Draw an X in the center of both sides of each post. Mark the side that is pointing inward, towards your pergola. Then make another X on the opposite side of the post. These markings will give your cross beams something to rest on as you nail them in. Make these markings on all four posts.

Part 17

Hammer nails halfway into the posts

The nails you use should be 4 inches (10 cm) long. Place the nails where you made your marks. These nails will temporarily hold up the girders or cross beams that will run horizontally across your pergola. Drive the nail halfway in on each side of all 4 posts

Part 18

Rest 2 by 10 feet (0.61 m × 3.05 m) cross beams on top of the nails

Use the nails to hold your cross beams in place and keep them level. Each post should have 2 sets of cross beams on opposite sides of the post.

Place a level on top of the cross beams to make sure that they are level, then clamp them to your foundation posts to hold them in place.


Part 19

Screw or bolt the cross beams to the posts

Screw the cross beams into the posts with bolts or 4 inches (10 cm) screws. Place 2 screws on each end of the cross beam to secure them tightly. Your pergola should now have 2 cross beams running parallel to each other on each side of the structure.

If the beams aren't level, remove the nail and adjust their placement.
You can make slightly angled cuts on the end of your cross beams and rafters to give your pergola a more customized look.

Part 20

Remove the nails that you used to steady the crossbeams

Use the back of the hammer to pull out the nails that you used to steady your cross beams. They should stay in place if you screwed them into your foundation posts properly.


Part 21

Lay 8 rafters across the cross beams

Your rafters should be the same size as your cross beams, or 2 by 10 feet (0.61 m × 3.05 m). Arrange the rafters so that they lay perpendicular to your cross beams. Each rafter should be spaced 1 foot (0.30 m) away from the next rafter.

Configure the rafters onto the cross beams so that they look how you want. You can add more rafters and space them closer together, or add fewer rafters and space them further apart.

Part 22

Hammer one nail into each end of each rafter

You'll want to use nails that are at least 4 inches (10 cm) long. Angle your nail so that it goes through the side of the rafter and down into the crossbeam. Do this once on each side of the rafter to hold it in place.

iv class="contenidoper">


Part 23

Nail 8 top slats into the rafters

The top slats can be thinner pieces of wood, or 1 by 2 inches (2.5 cm × 5.1 cm) thick and 8 feet (2.4 m) long. Line all 8 of the slats a 1 foot (0.30 m) apart and drive a nail into each end of the slats. This will finish the roof of your pergola.